|
Photograms/Rayographs
What is a Photogram/Rayograph? A Photogram or a Rayograph is a picture that is made without a camera. It's made by placing objects onto photographic paper then exposing it to light. The result that you would normally get is a negative shadow image, this shows the changes on the tone which depends on what object you use. The areas of the paper that you don't let light hit will turn white, on the other hand areas of the paper that you expose through a transparent object will turn a dark grey or black colour. The artist called Man Ray is one of the popular people who made Photograms/Rayographs, he was also the person who called Photograms/Rayographs 'Rayographs'. How do you make a Photogram/Rayograph? First of all you have to pick around 3 objects or more. Now you have to arrange these objects that you're chosen onto the photographic paper you have. You now have to expose this to light for 10 seconds and then turn the light off (There was a red light that doesn't effect the photographic paper in the dark room I was in so that I could see a bit). Now you have to take the photographic paper to the wet where there is 3 different chemicals. The chemicals that I had to soak the photographic paper in were developer, fixer and stop bath. The developer chemical causes the silver iodide of the paper (which is another chemical inside the paper) to turn really dark which is how you get black background. The chemical called stop bath is used to stop the photogram from removing the silver iodide if it's been exposed to light (Fixer removes the silver iodide). |
These Photograms/Rayographs were made by Man Ray. As you see there are different types of objects that he used in the Photograms/Rayographs such as scissors, rulers and more!
|
Here are two Photograms/Rayographs I made in the dark room.
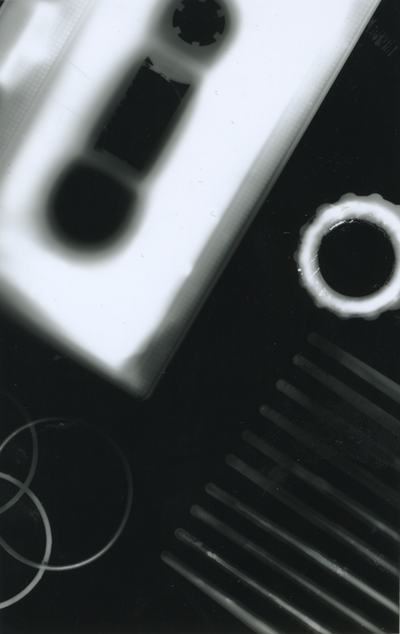
Photogram 1
On my first Photogram I used an equal amount of transparent and opaque objects. As you can see the objects that are opaque are darker than the ones that are transparent, because they let more light in and the opaque ones don't. The largest objects I used in this Photogram was a video tape, as you can see it went really well as it's right fixed to the top left. The image is well balanced out due to the amount of objects used and the amount of opaque and transparent objects. I think this photogram went really well. |
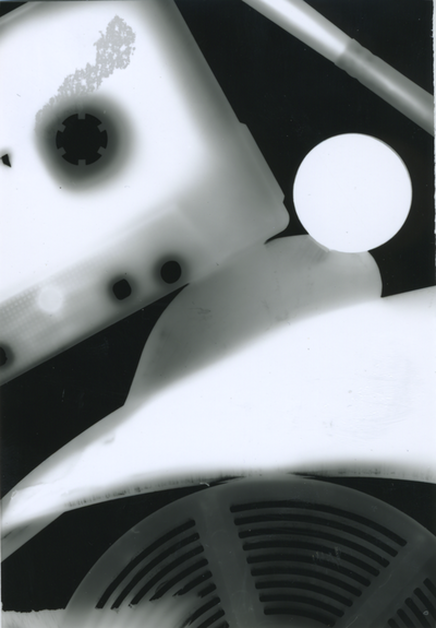
Photogram 2
On my second Photogram I decided to use more objects and more opaque objects because I wanted more white parts to contrast with the background. I used about one or two transparent objects and it went alright. The object at the bottom isn't completely dark - it's more of a light grey colour which looks original. This photogram did go well as well but I think adding more objects would make it more interesting but I didn't wanna add too much on this one because I wasn't so sure how it would go. |
If I had another opportunity to create photograms in the dark room I would:
- Use more objects and more opaque objects in my photogram.
- Use larger photographic paper.
- Use objects outside of school.
- Use more objects and more opaque objects in my photogram.
- Use larger photographic paper.
- Use objects outside of school.
