History of Camera-less photography
The first photographs that were made, were made with no cameras. There were lots of types of camera-less photography such as Cyanotypes, Photograms, The Camera Obscura and many more! All these types of camera-less photography were obviously made without a camera. Before cameras got invented, photography was quite fun as there were many types of camera-less photography people tried. All the types of camera-less photography required a source of light (most of them needed ultra violet light). There are other types of camera-less photography which were not as popular however they were really good, those are Chemigrams, Digital C-Print, Dye Destruction Print, Gelatin-Silver Print and Luminograms.
Examples of Camera-less Photography:


|
Camera-less Photography artists:
There were some famous people who liked inventing with camera-less photography. They are Floris Neususs, Pierre Cordier and more! Pierre Cordier is a special person. He was one of those people who works more of a painter and a printmaker than a photographer. Sometimes he didn't know what he was doing whether that was photography, painting or printmaking. Pierre Cordier was known as the father of Chemigrams. He is a Belgian artist and he is the person that first invented Chemigrams. Chemigrams were another form of camera-less photography and Pierre Cordier successfully made lots of Chemigrams. Examples are on the right. |
|


Chemigrams are a form of camera-less photography. It was first invented in the 1950s by Pierre Cordier and Chemigrams involve using photographic paper (like other forms of camera-less photography). Chemigrams are made with photographic paper and some chemicals which are developer, stop and fixer. Unlike Photograms, Chemigrams are made under the bright light which means you reveal light into the photographic paper.
Making a Chemigram:
Items you need:
- Photographic paper
- Three trays with developer, stop and fixer chemicals
- An object that you will use to make the Chemigram
1. Get your object that you want to use out and dip it into the developer.
2. Place your object onto your photographic paper gently. Hold onto the object for around 40-60 seconds.
3. Remove your object and then place the photographic paper into the stop for around 30 seconds.
4. Remove and then place the paper into the fixer for around 5-10 minutes.
5. Now remove your paper and then wash off the chemicals into water.
Example of a Chemigram:
My Chemigram:

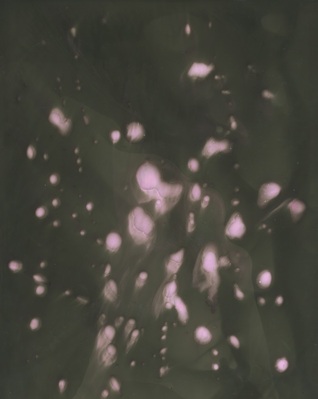
I tried something different. I put masking tape on the photographic paper and placed it in the chemicals in reverse order. I think this went good, you can see the small gaps when the masking tape was peeled off. There are little dots in between them and I used a range of sizes of masking tape. If I was to make the same Chemigram again, I would add some writing or paint around it to make it look more decorative. |
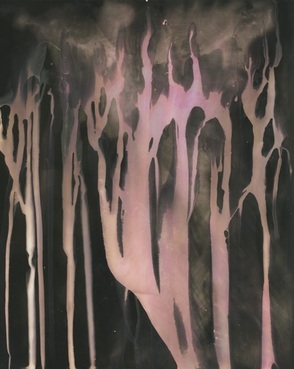
On this Chemigram, it seems like someone painted with a chemical at the start. I really like the drops that are falling in this picture. The effect of the colours are really this, as you can see in the middle you can see light pink which contrasts with the darker colours. If someone would make this Chemigram again, they should leave it in the chemicals for a longer time because I'm interested on how it will go if that was to happen.
|
More chemigrams:
I really like the colours of this Chemigram and how they are splattered out like blood, however it's pink. There are small and big drops all around. This Chemigram can be improved by painting on some shapes and different patterns.
Photograms:
As we know Photograms are another form of camera-less photography. Photograms are made by placing objects onto photographic paper and then exposing it to light. Photograms are quite similar to Chemigrams, they involve placing the photographic paper into the 3 chemicals which are fix, stop and developer. Man Ray was a famous person that made Photograms and they are really good.
As we know Photograms are another form of camera-less photography. Photograms are made by placing objects onto photographic paper and then exposing it to light. Photograms are quite similar to Chemigrams, they involve placing the photographic paper into the 3 chemicals which are fix, stop and developer. Man Ray was a famous person that made Photograms and they are really good.
|
Examples of photograms are on the right: |
|


Recently, I've made some photograms and pinhole pictures.
Here are some:
Here are some:
|
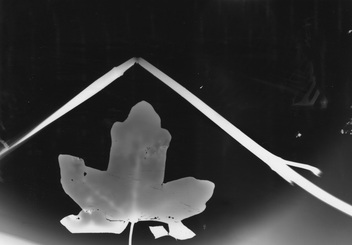
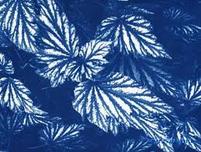
On the left one I made a photogram with only one leaf, however it turns out to be some twigs on it as well - this is probably because the twigs that were near it got in the way and I didn't see it because I was in the dark room. You could see some faded white lines in the background and a shadow of a leaf, this is possibly because I haven't left the picture in the chemicals for long enough so if I were to do this again I would leave the picture in the chemicals for a longer time and move everything out of the way except the object that I want to be in the picture.
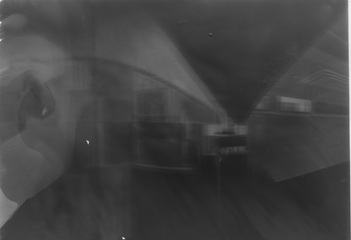
Here's a pinhole camera that I made. Most of the picture is quite light and you can see some of the buildings in the background. I think that this picture was quite good however as you can see there is a hand on the left which means that during the time that the picture was being took my hand got in the way. If I was to make this again I would be more careful so that my hand doesn't get in the way of the pinhole and hold it more steady because I think the pinhole camera moved. |
Luminograms:
Luminograms are another form of camera-less photography. They are more rare to come by and they are images that are created by exposure of chemicals to light or photosensitive materials without an object. This is a really original idea and each photograph that is took by using the luminogram technique can't be done again.
David Robinson was one of the famous artist that makes loads of Luminograms. He used hand-cut mushrooms and photosensitive paper to make the Luminograms, they look really good and professional! He arranged lots of and different types of mushrooms on a plate glass of his enlarger and he uses the light that exposes to the object to create mysterious night time worlds.
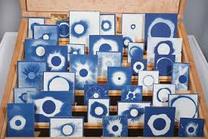
Some Luminograms by David Robinson:
Luminograms are another form of camera-less photography. They are more rare to come by and they are images that are created by exposure of chemicals to light or photosensitive materials without an object. This is a really original idea and each photograph that is took by using the luminogram technique can't be done again.
David Robinson was one of the famous artist that makes loads of Luminograms. He used hand-cut mushrooms and photosensitive paper to make the Luminograms, they look really good and professional! He arranged lots of and different types of mushrooms on a plate glass of his enlarger and he uses the light that exposes to the object to create mysterious night time worlds.
Some Luminograms by David Robinson:


More Luminograms:


A timeline of Camera-less Photography
John Herschels' Cyanotype
1792 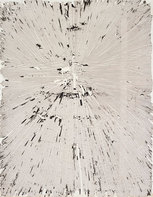
Pierre Cordier's Chemigram
1966 |
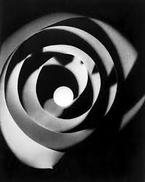
Man Ray's Photogram
1901 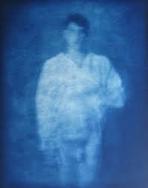
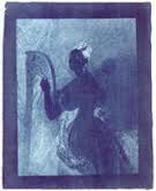
John Dugdale's Cyanotype 2000
|
A.E. Graves's Cyanotype
2005 |
Dario Robleto's Cyanotypes
2012 |
Claude Bouchez's Cyanotypes
2013 |
Jefferson Hayman Cyanotypes
2014 |
A Photogram:
|
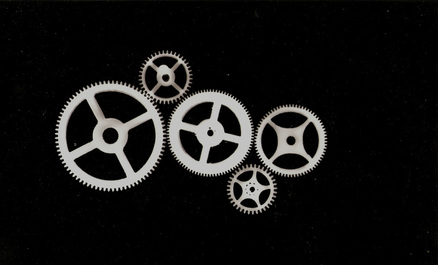
I can see 4 circle's with lines connected. It seems to be cogs and they have spikes around it. Each cog is a different size and the background is black which indicates that this image could be a photogram/rayograph. On 2 of the cogs I can see small dots and the larger one has less dots than the smaller one. There are also circles inside the circles.
This is a recognisable image. As I said, the objects are cogs. There's nothing much that I can't see or is missing, however the little dots should be bigger in my opinion to help people recognise it more. There is quite a lot of space in the background that can be filled with other objects. The background is quite boring even though it is a photogram and the composition doesn't show where the cogs start and end since they are in different sizes. The composition is quite busy however it's quite open as well (mostly the inside). |
My Idea:
I have decided to create a camera-less photograph using the Photogram technique. I am particularly interested in the work of Man Ray. I want to try to create an image of random personal objects. I have chosen to make an image like this, because it is original and unique. The outcome will be random and I want to make something abstract. Not a lot of people usually make images like this, because they're scared that the outcome might be bad but I'm not because I can always improve it.
I have decided to create a camera-less photograph using the Photogram technique. I am particularly interested in the work of Man Ray. I want to try to create an image of random personal objects. I have chosen to make an image like this, because it is original and unique. The outcome will be random and I want to make something abstract. Not a lot of people usually make images like this, because they're scared that the outcome might be bad but I'm not because I can always improve it.
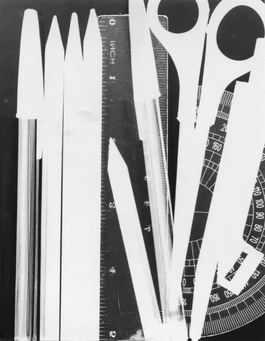
This was one of my images from my idea. I've placed some stuff from my pencil case onto the photographic paper such as pens, pencils and rulers. This photogram went pretty well - I like how you can see the numbers on the ruler and protractor. This is because the ruler and protractor is transparent and the object at the bottom in white is my glasses case. It's hard to tell what that object is because the object is opaque. To improve I can add more transparent objects to see how it would look and the opaque objects can't be large. |
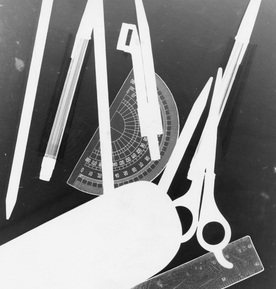
This time I tried putting the objects into fixed position. It was a bit hard because the scissors were quite large for the size of the photographic paper. I filled the paper with lots of objects which was ok, however I feel that there is too much white on the paper. To improve in the future I can use less objects so that it is not filled up as much and place the transparent objects on top of opaque objects to make it stand it out more.
|
Chemigrams:
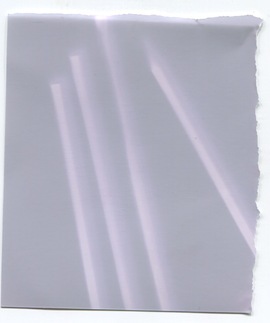
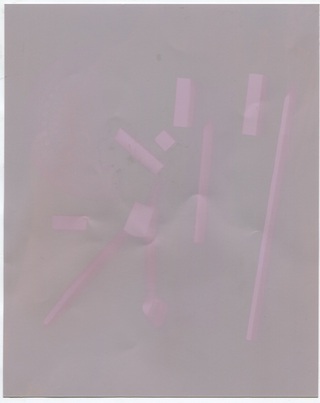
Here's a Chemigram I made. It was different because I didn't paint any chemicals onto it, I just placed some objects onto the photographic paper and let it expose to light - then washed it in water. As you can see this image is quite abstract because the objects look very similar. They are all pencils and pens, this chemigram went pretty well. It might be simple but it worked out well as it had a pink effect towards it. To improve, I could leave the chemigram exposed to light for longer. |
Again, this is another abstract image and I used the same technique for the last Chemigram I made. I placed more objects from my pencil case and placed it onto the photographic paper - this image went pretty well (you can slightly see a compass and some pencils). The image is more dark than the last one. To improve, I can wash the Chemigram for a longer time and place more objects in the photographic paper.
|
